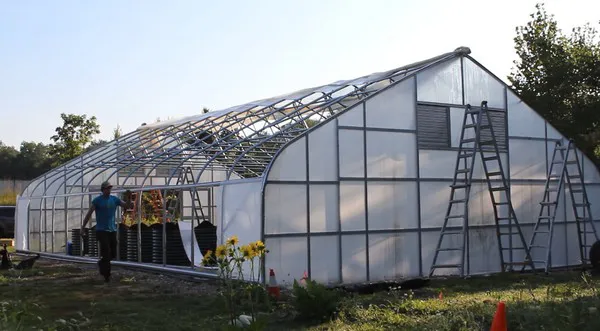
Saving energy when growing has never been so crucial as nowadays. There are many ways in which growers can save up on their energy bills. One of the solutions can be a double-layer inflated plastic. “Double-layer inflated plastic covering does a wonderful job at providing insulation,” says the Tunnel Vision Hoops team. He further explains that when heating the greenhouse, proper insulation can make the grower save on fuel costs, for instance. “And on top of that, double layer inflated plastic has a direct impact on the health of the plants.” Yet, installing it and inflating it sounds like a quite difficult task. So, how to do it? Tunnel Vision Hoops has released a tutorial video showing every step of the process.
Preparing the installation
First, they list the tools and materials a grower may need such as spring wire, a double aluminum channel in the infrastructure, a 6 mm anti-drip greenhouse plastic, a 6mm clear greenhouse plastic, an inflation blower fan, a polyester rope, screws or two-hole straps, and a jumper hose. They point out that using clear plastic for both layers is a viable option, but drip plastic prevents condensation from gathering and then dripping on the plants. “That’s why I use that for the internal layer,” they say.
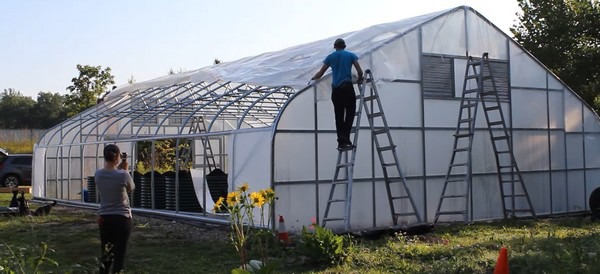
One of the pro-tip they give is to prepare the job site and to place some spring wire around the perimeter of the structure within arms’ reach. This is because a grower or installer can immediately take action and secure the plastic if a sudden gust of wind picks up. Then, it’s important also to place ladders, one for both ends of the greenhouse, and one inside the structure, so that additional help can be given if the plastic needs to be better pulled. After all, it’s ready, it’s time to prepare the first roll of greenhouse plastics. “We are going to use a round tube to skewer the roll of greenhouse plastic,” they say. “With the correct side facing down. Double-check the writing on the plastic to see which side is which. We then need to attach a rope, which needs to be long enough to extend from one end to the other of the structure.”
To get the plastic ready for the rope, having someone ready to help you is advisable. “Roll the side of the plastic towards the middle where the folds meet,” he explains. “Then, we are going to make a little nub, tying the plastic around and folding it back. Make a knot on the top of the poly fold, and one double knot at the bottom of the plastic nub.” This is crucial, they say, as it prevents the plastic nub from catching on your bows as you’re trying to pull it across the structure.
Installation time
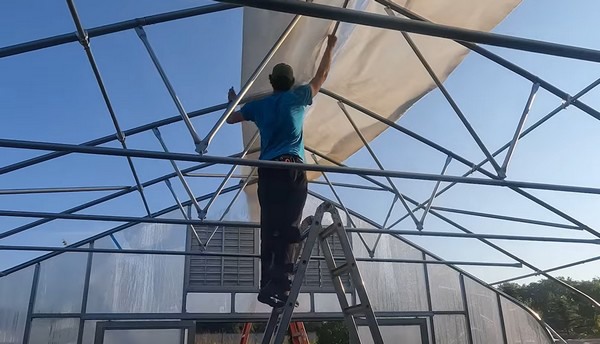
It is now the time to pull the first layer of plastic over the greenhouse. “One person grabs the nub, and the other person pulls the rope from the other side of the structure,” he explains. “One person lifts the plastic while the other pulls the rope. This prevents damaging the plastic. At the same time, this needs to go along the center of the structure. If it goes slightly off, go up the ladder you put into the greenhouse previously, and adjust the plastic correctly. When the plastic has reached the other end, remove the knot and flatten the plastic.”
If this was just a single-layer cover installation, then the plastic should be as tight as possible, they point out. However, since this is going to be inflated, it suffices to be sure that the plastic is well squared on the structure, and that any major wrinkle is pulled out. At this point, apply the spring wire, but without pulling too much. They also remark that this spring wire will be removed, but only after when the second layer will be secured. “We can attach both layers of plastic with one run of spring wires,” they say. “This saves cost on materials, but it mainly saves a ton of time, since we are not duplicating the process.”
To apply the second layer, just repeat what was done for the first layer. “This is the first critical moment,” he explains. It’s crucial to make sure that the folds are even on both sides so that there’s equal weight. Else, the plastic might get off the center of the structure, which would require you to start over. “It’s really important to keep the rope and the nub as close to the center pole as possible,” they point out.
Once the second layer has been pulled, untie the knot, and open the folds. “Pull just enough on both ends to get rid o major wrinkles,” they say. Then, start placing the spring wire on the top channel, making sure that the plastic is square and that it is not too tightly secured. Then, it’s time to drop down the sides of the plastic. As they explain, if this is done during a calm day, then it’s quite an easy task. If there’s some wind though, brace yourself for quite an (annoying) challenge. Place the spring wire, and repeat the process for the other side of the greenhouse.
Inflating
When the second layer is on, it’s time to install the blower to inflate the space between the two layers of plastic. Re-visit where you want to install the blower, and unwire the plastic in that space, as you need access between the two layers. So, get up on the ladder again, and pull out some spring wire in the space of choosing, while also being super quick to fasten it, else wind catching up may yield unpleasant surprises. “That’s why you put both layers and the spring wires before putting in the blower fan,” they remark. Put all the spring wires in the remaining run channels. “When everything is pinned and ready, it’s time to install the blower fan.”
The fan should be 10-12 inches above the hip rail. Attach the mount bracket on the bow, with the orientation based on the pre-drilled holes in the fan. “But worry not, all these blower fan kits come with instructions to figure out how to orient the mount bracket.” To put in the deflector now, go in between the layers where the hip rail plastic was left detached, and cut through the plastic. “Don’t cut too much though, and expand the hole using your fingers to expand it slowly and get it large enough to attach the deflector. Once done, come out from between the layers, and finish putting in the wire to secure the covers.”
We’re almost at the final step, but there’s one thing to do before the final touches: it’s jumper hose time. “When putting in the jumper hose, which will hang from the ceiling inside the greenhouse, you have to go out and take out a little spring wire, just enough to put your hand underneath the top exterior layer of plastic. Now, grab the jumper hose and remove the end seals. Squeeze the hose underneath both layers of the plastic, a little off the center purling. Slide the other hand in between the layers, and with a razor blade, push it through the most interior layer of plastic, through the hose hole, and use your fingers to widen the hole to fit completely through the first layer of plastic. Grab the end seals back, and put that on the hose, rotate to lock it. Now, do the other half with the same process. Secure the top plastic with spring wire – just one piece for both layers.”
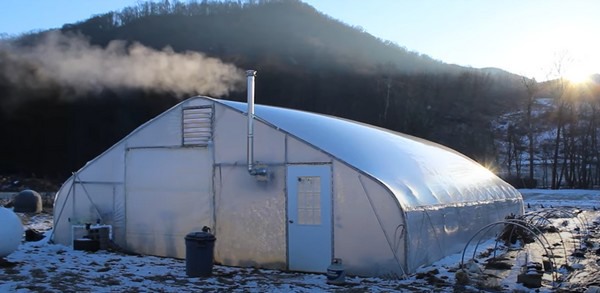
Now, the installation of the double-layer inflated plastic is done. To fully inflate the plastic, it might take up to 40 minutes- 2 hours, depending on the size of the greenhouse.
For more information:
Tunnel Vision Hoops
tunnelvisionhoops.com